
Materials: cleaner, measuring device, masking tape, exacto knife or razor blade and a sqeegee or credit card.
| Step 1 |
| Surface Preparation: It is necessary that the surface on which you will apply the vinyl lettering is clean and completely dry. You may use any of the following which are appropriate for your surface: a 2 to 1 mixture of isopropyl alcohol, a window cleaner (such as Windex), a household cleaner (such as 409) or a solvent |
| Step 2 | |
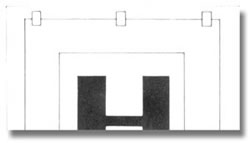 |
Use strips of masking tape to position your lettering. Measure similar letters (rounded letters with rounded letters or square letters with square letters) on each end to ensure lettering will be level
. |
| Step 3 | |
 |
Place a strip of masking tape across the top of the lettering.This will form a hinge and hold your lettering in place. For long lines or large letters (see step 6) you should separate them with your razor knife so that they are easier to handle.
|
| Step 4 | |
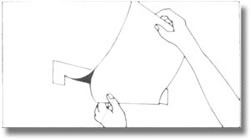 |
Lift lettering and pull away the backing paper a few inches at a time. Make sure the lettering sticks to the transfer tape and not the backing! Your exacto knife can be used to ease stray letters back into place.
|
| Step 5 | |
 |
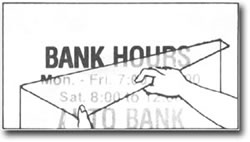
Use a squeegee or other object with a smooth edge to apply the lettering. Do not allow the vinyl to touch the surface prematurely.
Use overlapping strokes to apply the lettering beginning at the top center and working down and toward each edge. |
| Step 6 | |
 |
For larger letters, after Step 3, slice lettering into manageable sections. Then continue with Steps 4 & 5 for each section.
|
| Step 7 | |
 |
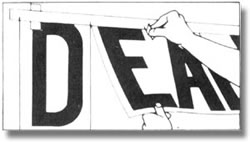
The final step is removing the transfer tape. Remove transfer tape carefully pulling at a 180° angle. If letters begin to pull up with the transfer tape, they have not been applied firmly enough. Using your squeegee, go over the lettering again with firm overlapping strokes then once again attempt to remove the transfer tape.
|